As you go through your Alma configuration settings, you can consider the following tips & tricks that may aid your workflows in Alma.
Fulfillment
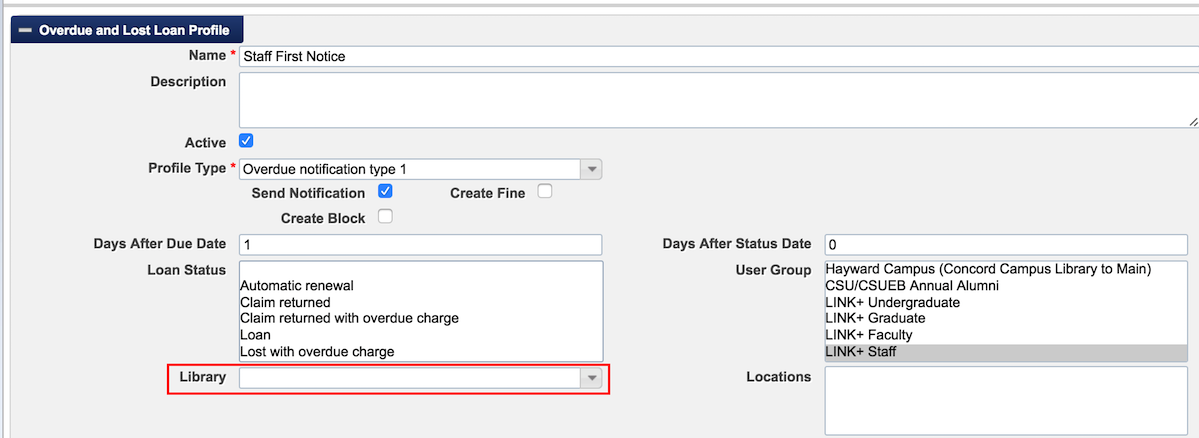
- Under Fulfillment Configuration | Physical Fulfillment | Overdue and Lost Loan Profile, set the Library setting to the blank entry for each of your profiles:
Notices are sent based on the item's current library. Unless you have a strong reason to set up separate Overdue and Lost Loan profiles for different libraries, you will ensure that notices are sent for all items within one profile by setting the Library field to the blank entry. In order for notices to be sent for items at a particular Library, the Library must be listed in an Overdue and Lost Loan profile, or this field must be set to the blank entry. You can set up a pop-up message to alert you that the due date for a loan has been shortened due to the user's expiration date. Configure this under Fulfillment Configuration | Configuration Menu | General | Other Settings | and set shortened_due_date_notifications to EMAIL or MESSAGE_EMAIL. View more details on this setting in the online help: Alerts for shortened due dates.
The pop-up alert will look like this:
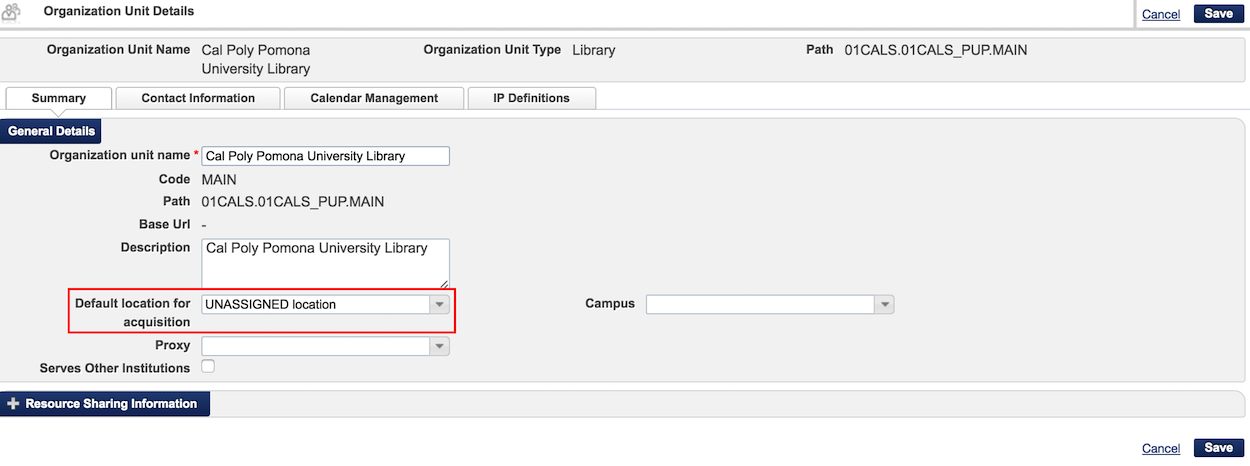
All of the orders that you place in Alma will use the default acquisitions location that is set for the associated Library as the item's default location. Ensure that this location is set to the most useful default location by navigating to General Configuration | Configuration Menu | Add a Library or Edit Library Information | select the Libraries tab and select Actions | Edit for every Library that you will use for acquisitions in Alma. Ensure that the default location for acquisition is set to a useful location – something like your main book stacks.
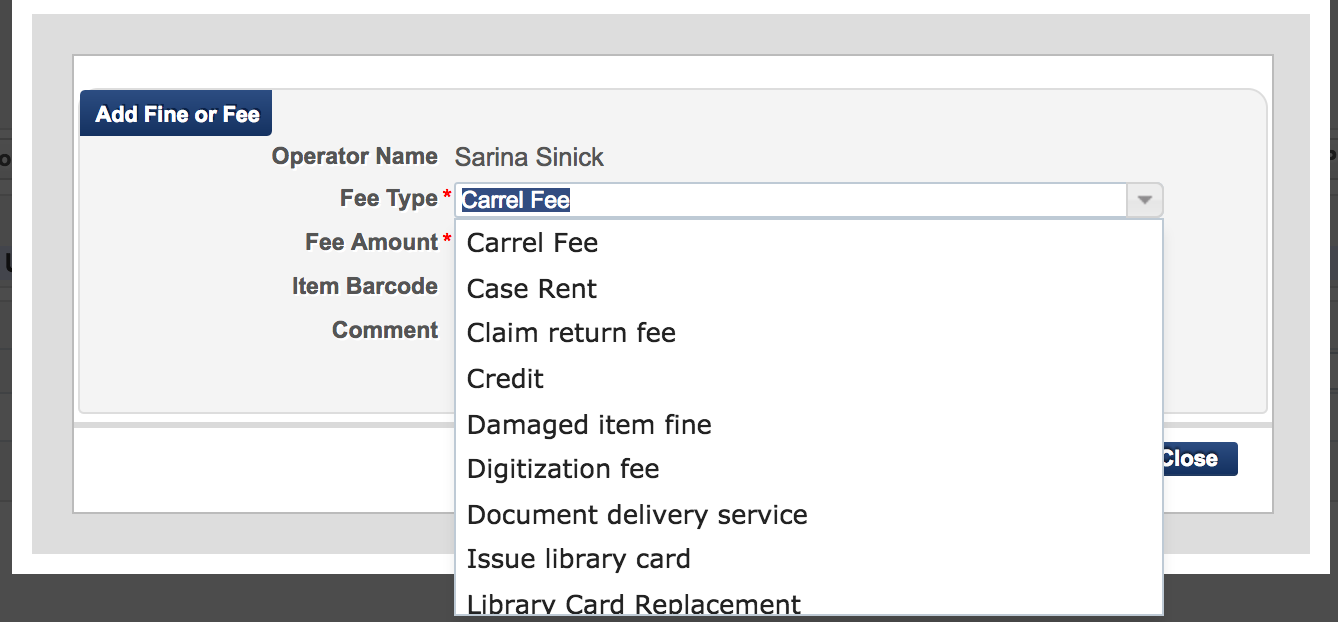
- Customize your Fines/Fees Behavior table and set the Manual Creation column to False for any Fine/Fee types that you won't use in Alma. By default, there are about 20 fine types that can be used to manually assign different types of fines in Alma. Because many of these fine types are not actually in use (i.e. 'Locker key', 'Thesis folder'), you can hide these fine types so that they don't appear in the fine type dropdown:
In order to hide irrelevant fine types, navigate to User Management Configuration | Configuration Menu | Patron Charges | Fines/Fees Behavior. In order to hide a fine from the Fee Type menu, click Customize and set the Manual Creation column to False for all fine types you don't want to appear in the above dropdown menu.
You can also request that the fine/fee type description be modified by opening a support ticket with Ex Libris. - Remove any locations that don't actually contain inventory in Alma. For many campuses there are electronic or internet locations that aren't going to be used as locations in Alma. It's a good idea to remove these locations, so that they aren't cluttering up your location options. In order to delete a location, navigate to Fulfillment Configuration | Configuration Menu | Physical Locations and look at the location you wish to delete. Select Actions | Delete to remove a location that doesn't have any attached holdings/items.
Resource Management
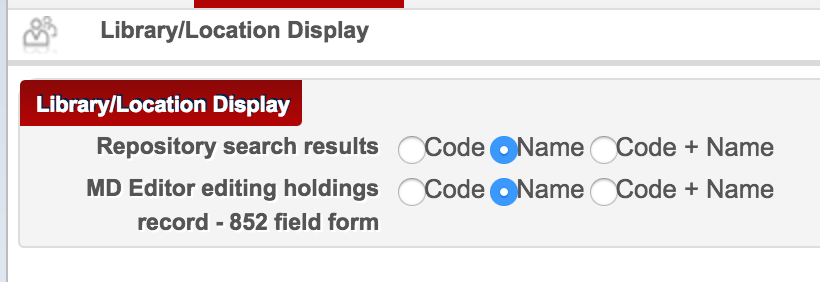
- In order for the Repository search results and the Metadata Editor for holdings to display the location name for items instead of only the location code, navigate to Resource Configuration | Configuration Menu | Library/Location Display and select Name or Code + Name:
- As with the Fine/Fee type table, you can also customize which item material types you want to use in Alma. This will alter which material types display as possible inventory material type values. It will help streamline your material type choices if you deselect any item material types that you don't plan to use in Alma. You can also alter the labels for the default item material type values, if you need to reflect a material type that doesn't exist in the table. Navigate to this table by going to Resource Configuration | Configuration Menu | Physical Material Type Descriptions. Deselect Enabled for any values that you don't want to use. Alter the Description for any new values that you would like to use in Alma.
Acquisitions
Associate your acquisitions department with a circulation desk, so that acquisitions staff may receive items directly, without setting them in transit to the circulation desk. In order to streamline the receiving process, you can set up a circulation desk to fully function as an acquisition desk. This means that you will never need to use an ‘acquisitions desk’. Instead, all acquisitions staff will use the ‘circulation desk’ as their primary desk. The circulation desk effectively becomes a combined acquisitions desk and circulation desk. The procedure for how to set this up is here: Receiving In Process items in order to avoid In Transit. This procedure will allow you to avoid setting received items in transit at the point of receiving them. If you are a small library, or don't need to set items in transit after receiving them, this is a good configuration option.
Ensure your invoice configurations dictate the workflow used on your campus. Navigate to Acquisitions | Configuration Menu | Other Settings.
Two settings in this table affect the invoice status and next steps after it's created in Alma:skip_erp
True = invoices are sent to campus manually or using some mechanism outside of Alma to convey invoice information.
False = invoice information is exported directly to Peoplesoft from Alma.
handle_invoice_payment
True = library plans to enter invoice payment information obtained from campus accounting (such as payment date, voucher number, etc.). Once invoice payment information is sent to campus the status of the invoice remains open with a status of “Waiting for payment” until additional information is entered.
False = once library sends invoice information to campus accounting the invoice is marked as paid and closed. No further processing is required.
- Check that your default Purchasing review, Invoice review and Invoice approval rules reflect your institution's workflow and approval requirements. Your default settings will vary depending on how your institution filled out the configuration worksheet. These rules are worth checking to ensure the approvals/reviews required at your institution are set up correctly and for institutions that don't require approval or review or have a small staff where one person does all the ordering and invoicing, setting these rules to False will ensure the most efficient workflow.
Acquisitions | Configuration Menu | Purchasing Review Rules
Click Edit in the default rule to see how it's configured. This rule can't be configured beyond marking it "true" or "false" and will be applied if no other review rules are fulfilled.
True = all Purchase Orders go into the review queue prior to being sent out.
False = all Purchase Orders do not require review before being sent.
Acquisitions | Configuration Menu | Invoice Review Rules
Click Edit in the default rule to see how it's configured. This rule can't be configured beyond marking it "true" or "false" and will be applied if no other review rules are fulfilled.
True = all invoices go into the review queue.
False = all invoices do not require additional review.
Acquisitions | Configuration Menu | Invoice Approval Rules
True = all invoices go into the approval queue.
False = all invoices do not require approval.
4. Check the PO Line Type configuration table to ensure the ones you use frequently are enabled. Acquisitions | Configuration Menu | Purchase Orders | PO Line Types. You may also want to disable PO Line Types that are not used by your institution in order to make your PO Line Type drop down menu more compact and user friendly. See Alma Online Help page Enabling/Disabling PO Line Types for detailed instructions and roles required to make these configuration changes.


