Partners can be configured in the local Institution Zone or in the Network Zone, but follow the same setup. To start sharing with a new partner you need to add a locate profile, partner profile, and add them to a rota. They will need to follow the same steps, but with CSU data, to complete the process. This is the process followed when setting up the CSU and SUNY partnership.
Locate Profile
To find the information necessary for the locate profile your partner will make for your institution go to Configuration → Fulfillment → Resource Sharing → Locate Profile and select your own institution. Go to the Locate Profile Parameters tab and copy the settings to send to your new partner.
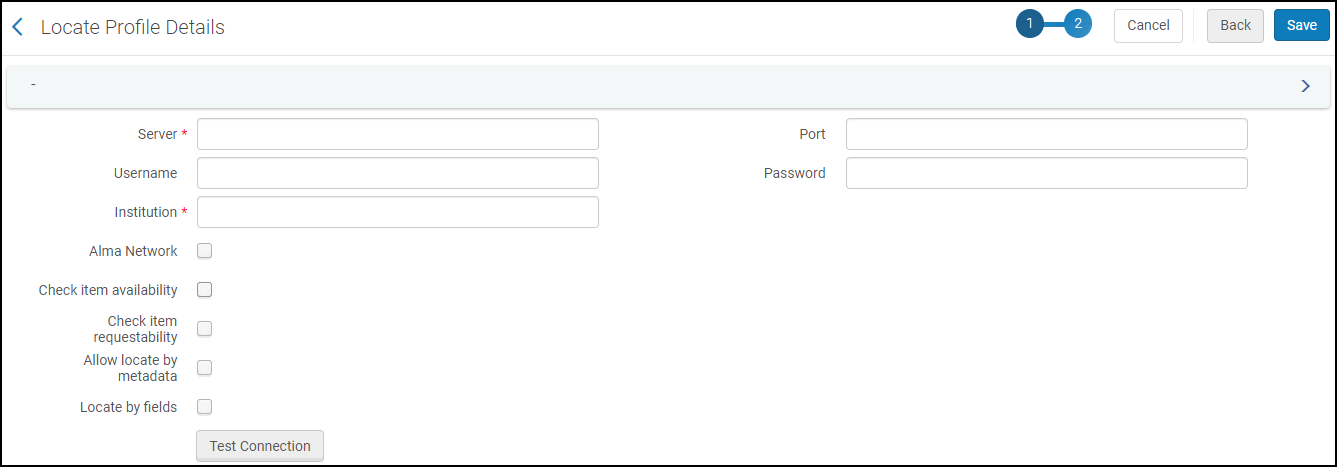
Once your partner has sent you their settings you will need to make a locate profile for their institution. Return to Configuration → Fulfillment → Resource Sharing → Locate Profile and select “Add Locate Profile.” Add a name and description for your partner and set their type to Alma, then select “next.” Add the settings they provided such as Server and Institution. These settings need to match exactly. You now have a locate profile for your new partner.
Partners
Once you have a Locate Profile you can set up a new partner. Once again, you will need to find your own information to send to your partner and vice versa. Go to Fulfillment → Resource Sharing → Partners and select your own institution to get your settings to copy and send to the new partner.
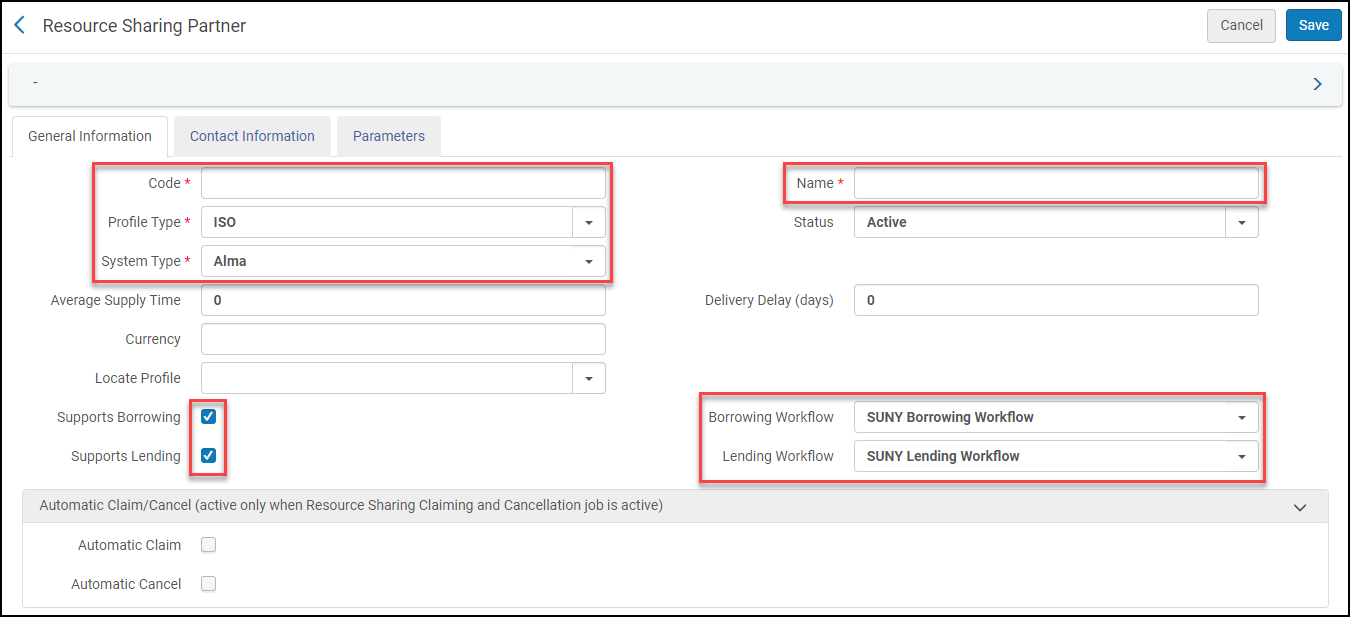
To make a new partner go to Fulfillment → Resource Sharing → Partners and select “Add Partner.” Add your partners Code and Name in the General Information Tab. For Alma partners, the “Profile Type” will be “ISO” and the “System Type” will need to be switched to “Alma.” Add the Locate Profile you made for this partner in the previous step. Check “Supports Borrowing” and “Supports Lending.” Select the Borrowing and Lending workflows you want to follow. Proceed to the Contact Information tab.
On the Contact Information tab add any information you want to be easily available. For the CSU and SUNY partnership we added each institutions address.
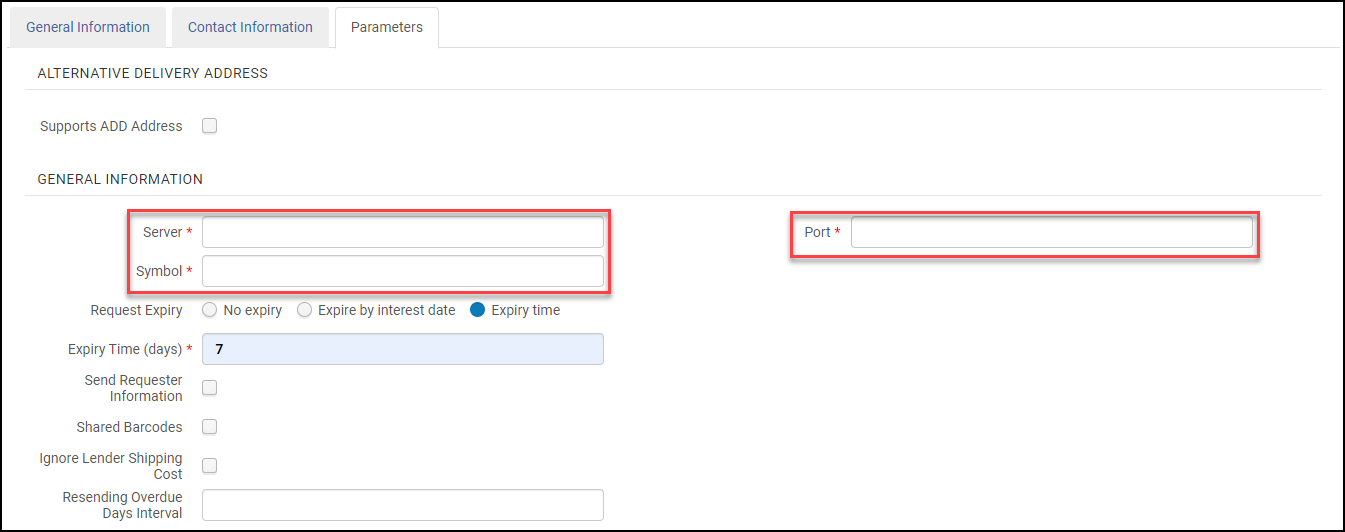
On the Parameters tab you will need to add the information provided by your new partner. Server, Symbol, and Port are all required and must match the information provided by the partner.
Rota Templates
Now it is time to either add your partner to a rota or create a new rota. To make and edit rotas go to Fulfillment → Resource Sharing → Rota Templates. To add a new rota select “Add Template.” Add a code and name for the new rota and decide if it has a fixed order or is a Non Ordered rota. Proceed to the next page to add partners to the rota by clicking “Save and add members.” Add the partner you made and any other partners you want in the same rota. For the CSU and SUNY partnership we made a new rota to run after each consortia runs their primary rotas. Save and you are done.


