The workflow will show you how to register an in-house use and then how to look at the in-house use for an individual item.
Step-by-step guide
Scanning items for in-house use can be done in several ways.
Method #1
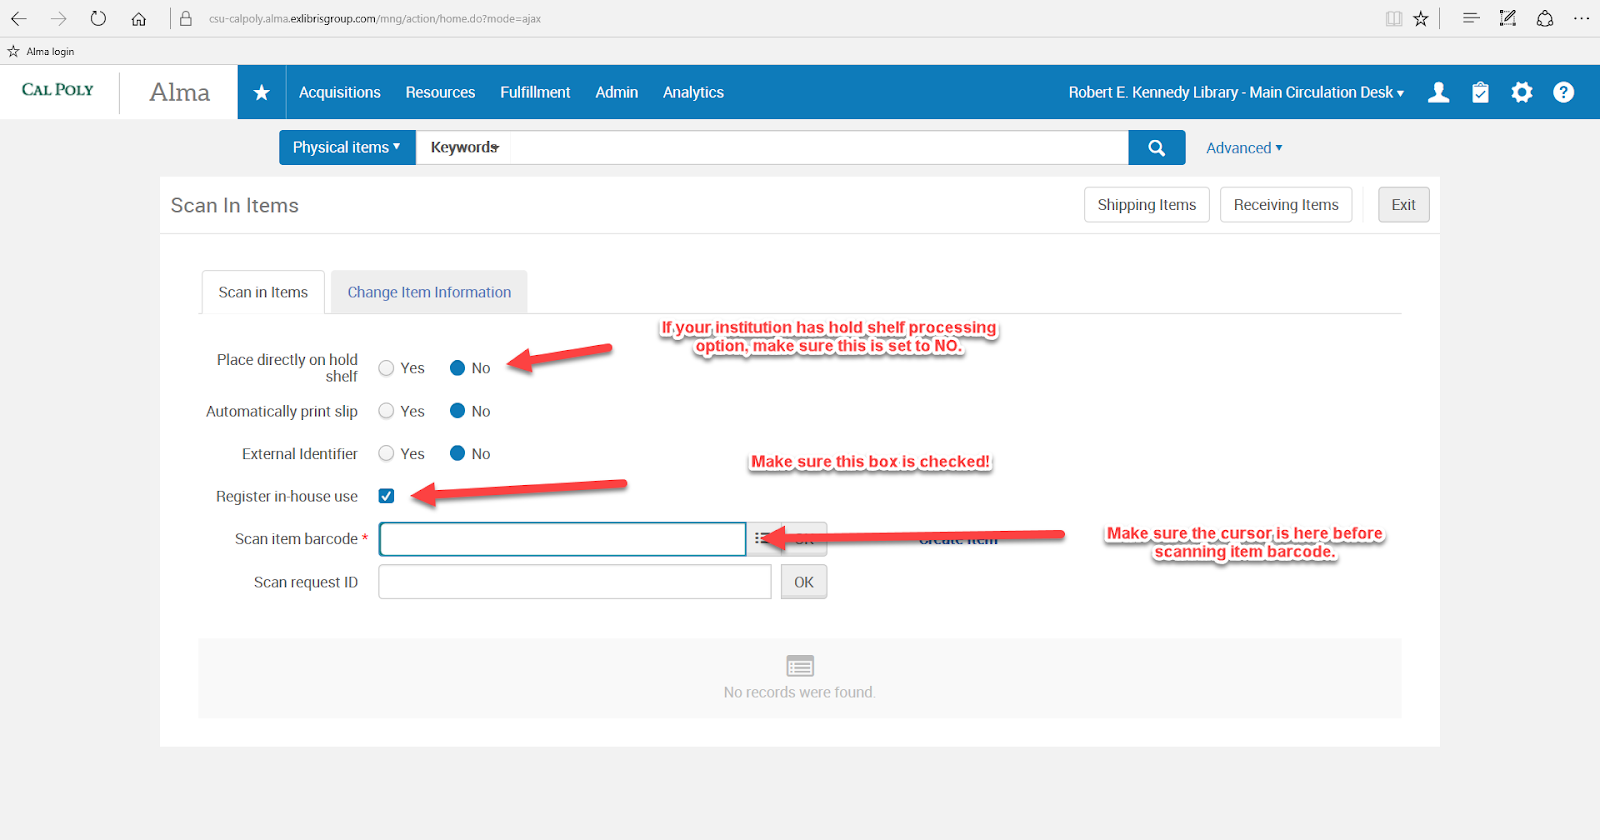
- Fulfillment → Resource Requests → Scan In Items
- Check that Place Directly on Hold Shelf is set correctly if your campus is using it.
- Make sure that Register in-house use is checked.
- Make sure cursor is in the Scan item barcode box.
- Check the screen after EACH item is scanned.
- Read any popups.
- Place item in the appropriate reshelving place according to the "destination."
Method #2
- Fulfillment → Return Items
- Check that Place Directly on Hold Shelf is set correctly if your campus is using it.
- Make sure cursor is in the Scan item barcode box.
- Scan in each item barcode.
To check inhouse use of an item:
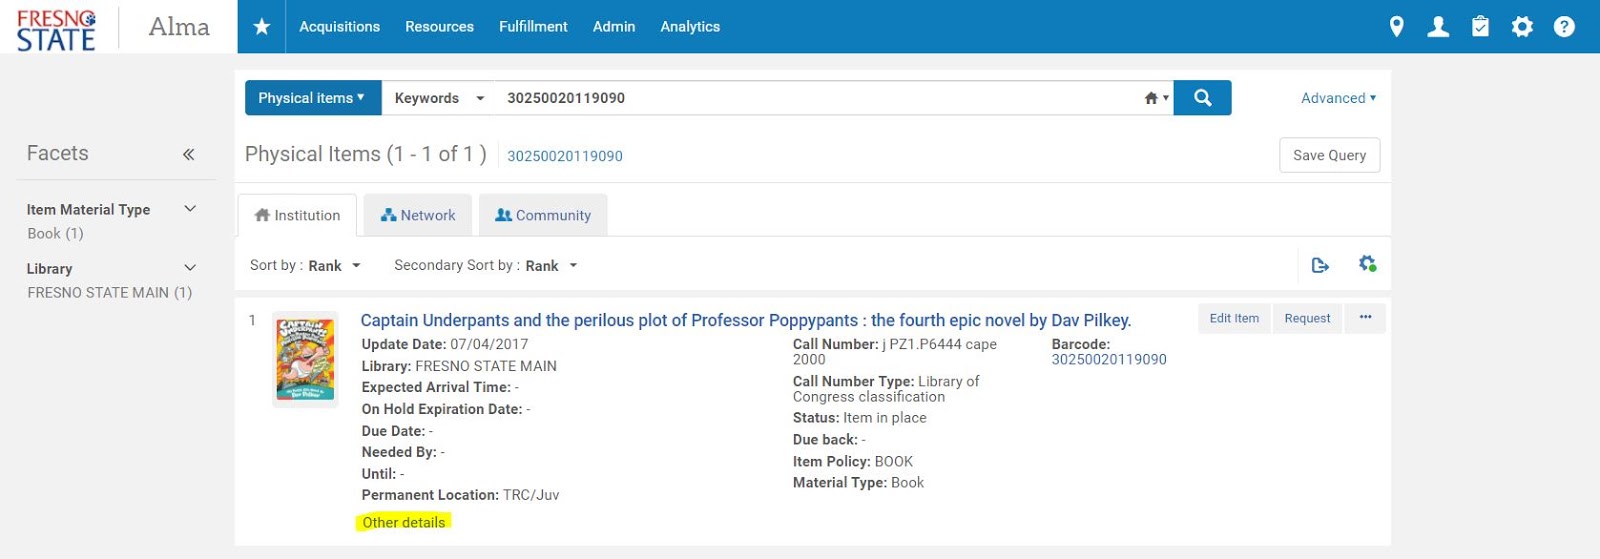
- Use a Physical items search. It's easiest to search by the item's barcode, but you can also search by title if you prefer.
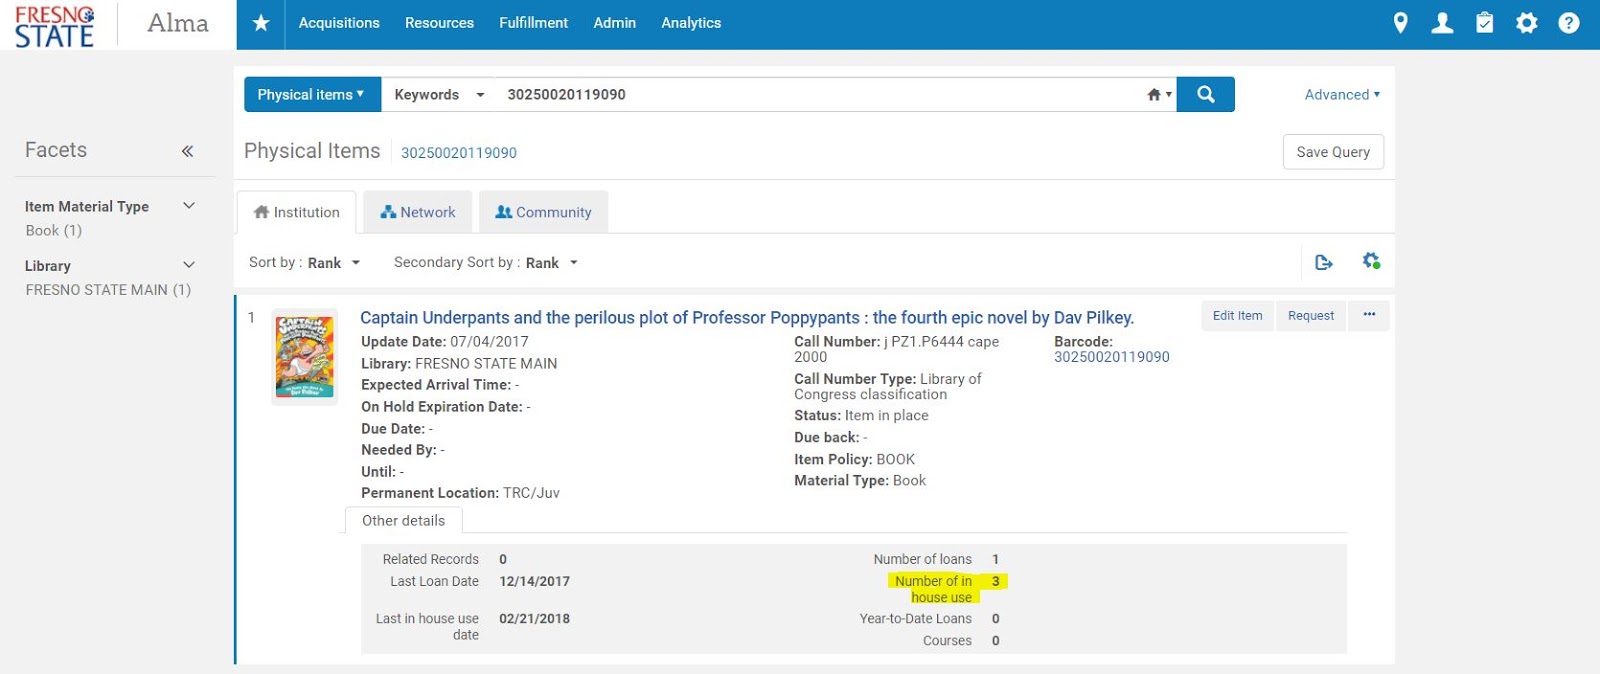
- Once you completed the search, click on Other details.
- A new box will appear which contains the number of in-house use:


