This document will give you step by step instructions to mark an item missing and then create a search list for all items marked as missing in Alma.
Step-by-step guide
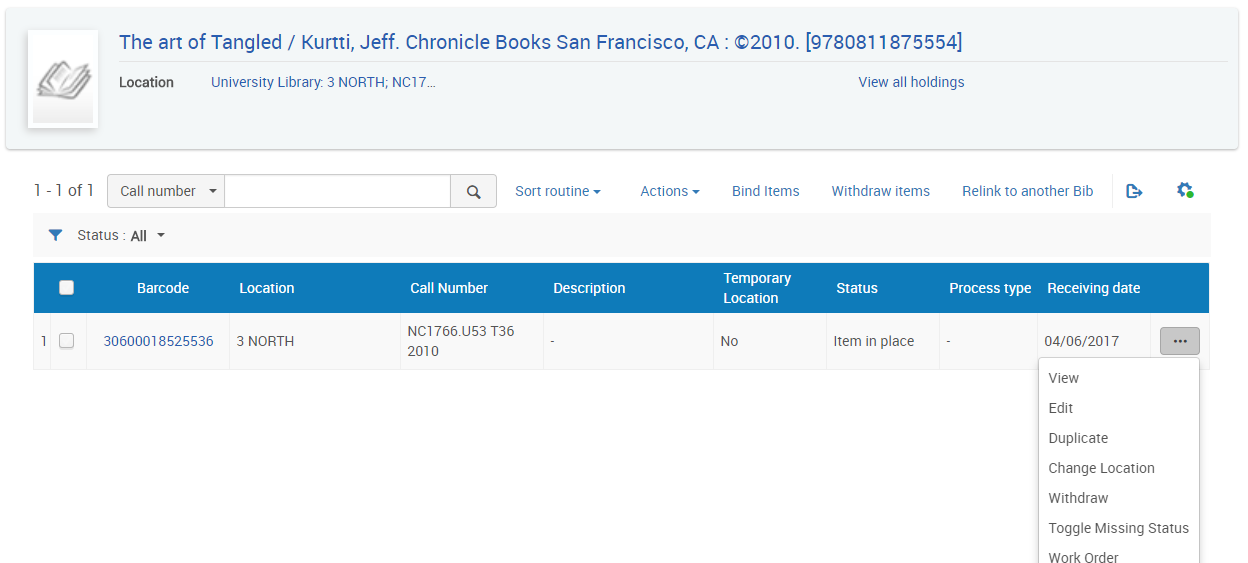
- Mark the item "Missing in Alma:
- From Physical Titles search, click Items
- For the specific item, click Toggle Missing Status
- Create Set
- Perform an Advanced search with the following criteria:
- Physical Items at Institution zone
- Process Type (under Physical Items list) equals Missing
- Perform an Advanced search with the following criteria:
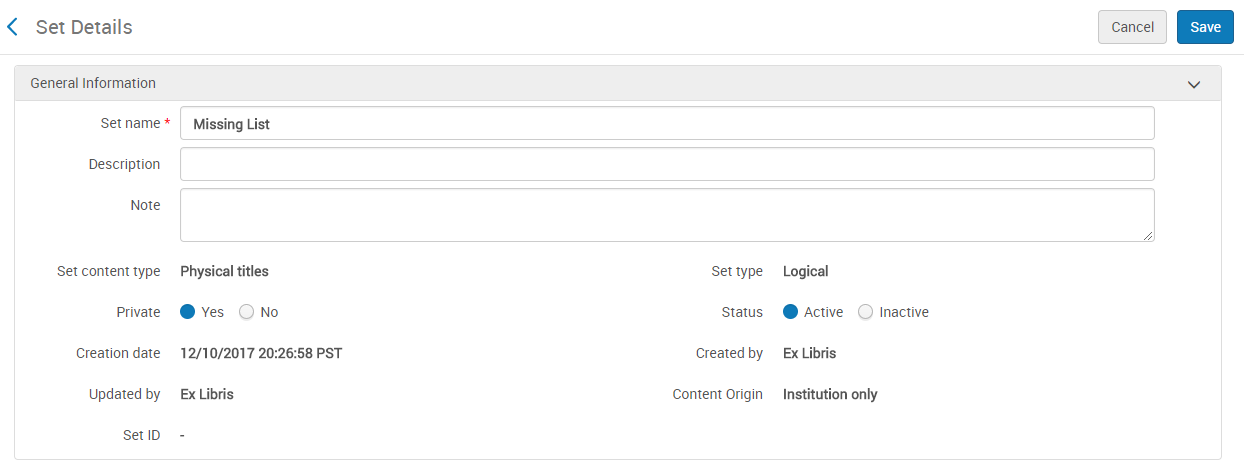
- Save Query
- Click Save Query
- Add a Set name and click Save. The search saves as a logical set. The search will run each time the set is opened.
- Compile and print the search list.
- Sets are found under Manage Sets in the Admin menu.
- View the results for the managed set.
- Export to Excel
- Organize the search list and print.
- Search items
- Found items
- Scan in under Return Items or Scan In items to remove "Missing" status.
- Search list suggestions:
- Itemized List: Create an itemized set based on the logical set while searching. Any items marked Missing from the time the itemized set was created will not be included in the list. Con: any found items will need to be removed from the set manually.
- Item Notes: Internal Notes can be placed in the item record to indicate search type, or number of searches. Add the internal note field to your advanced search to limit list to only those items.
- Change Physical Items Job: Use the change physical items job to update the internal notes of your itemized set.


