Adding All ScholarWorks Records to CSU Everything Search:
Contact bdudley@calstate.edu to have all CSU ScholarWorks records added to your systemwide Everything search tab in your local Primo.
Adding Campus SW Records to Own Search
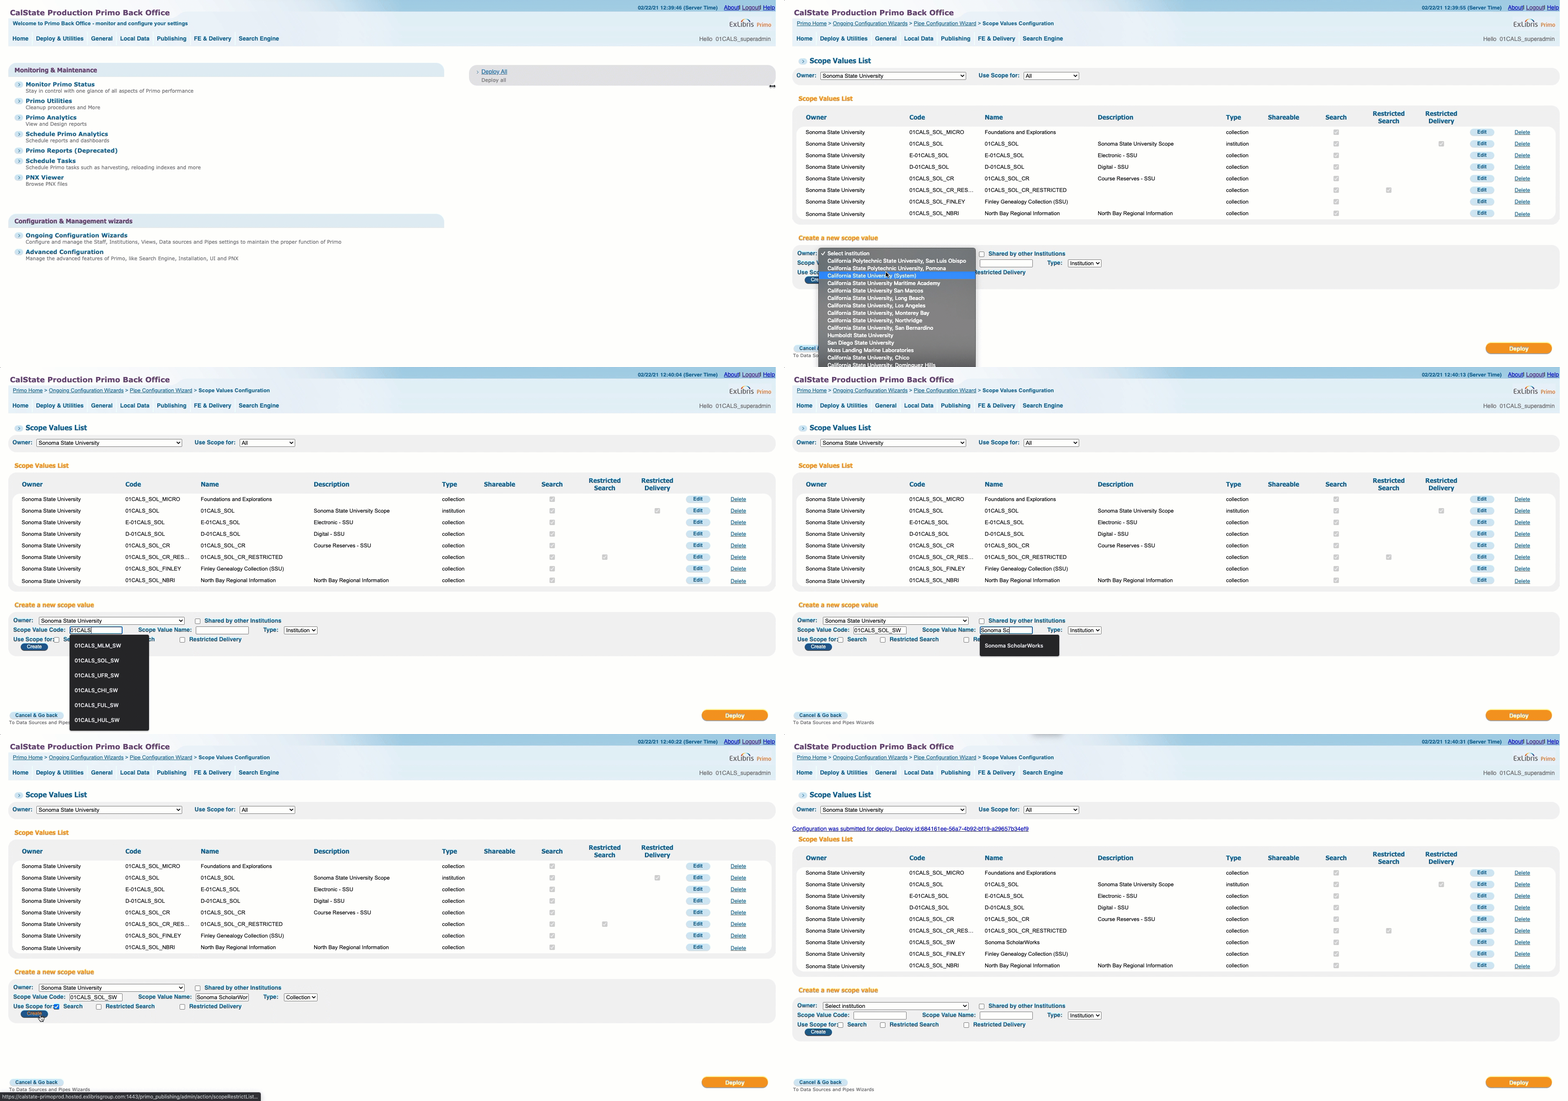
Step 1: Create ScholarWorks local scope
1) Go to PBO -> FE & Delivery -> Scope Values
2) Create a new scope value
Owner -> Your institution
Scope Value Code -> choose your Campus Scope Code from table
Campus Scope Code | Campus |
01CALS_UBA_SW | Bakersfield |
01CALS_UCI_SW | Channel Islands |
01CALS_CHI_SW | Chico |
01CALS_UDH_SW | Dominguez Hills |
01CALS_UHL_SW | East Bay |
01CALS_UFR_SW | Fresno |
01CALS_FUL_SW | Fullerton |
01CALS_HUL_SW | Humboldt |
01CALS_ULB_SW | Long Beach |
01CALS_ULA_SW | Los Angeles |
01CALS_MAL_SW | Maritime |
01CALS_UMB_SW | Monterey Bay |
01CALS_MLM_SW | Moss Landing |
01CALS_UNO_SW | Northridge |
01CALS_PUP_SW | Pomona |
01CALS_USL_SW | Sacramento |
01CALS_USB_SW | San Bernardino |
01CALS_SDL_SW | San Diego |
01CALS_SFR_SW | San Francisco |
01CALS_SJO_SW | San Jose |
01CALS_PSU_SW | San Luis Obispo |
01CALS_USM_SW | San Marcos |
01CALS_SOL_SW | Sonoma |
01CALS_UST_SW | Stanislaus |
Scope Value Name: Whatever you want
Type: Collection
Use scope for: Search, others as appropriate
3) Click Create
4) Deploy
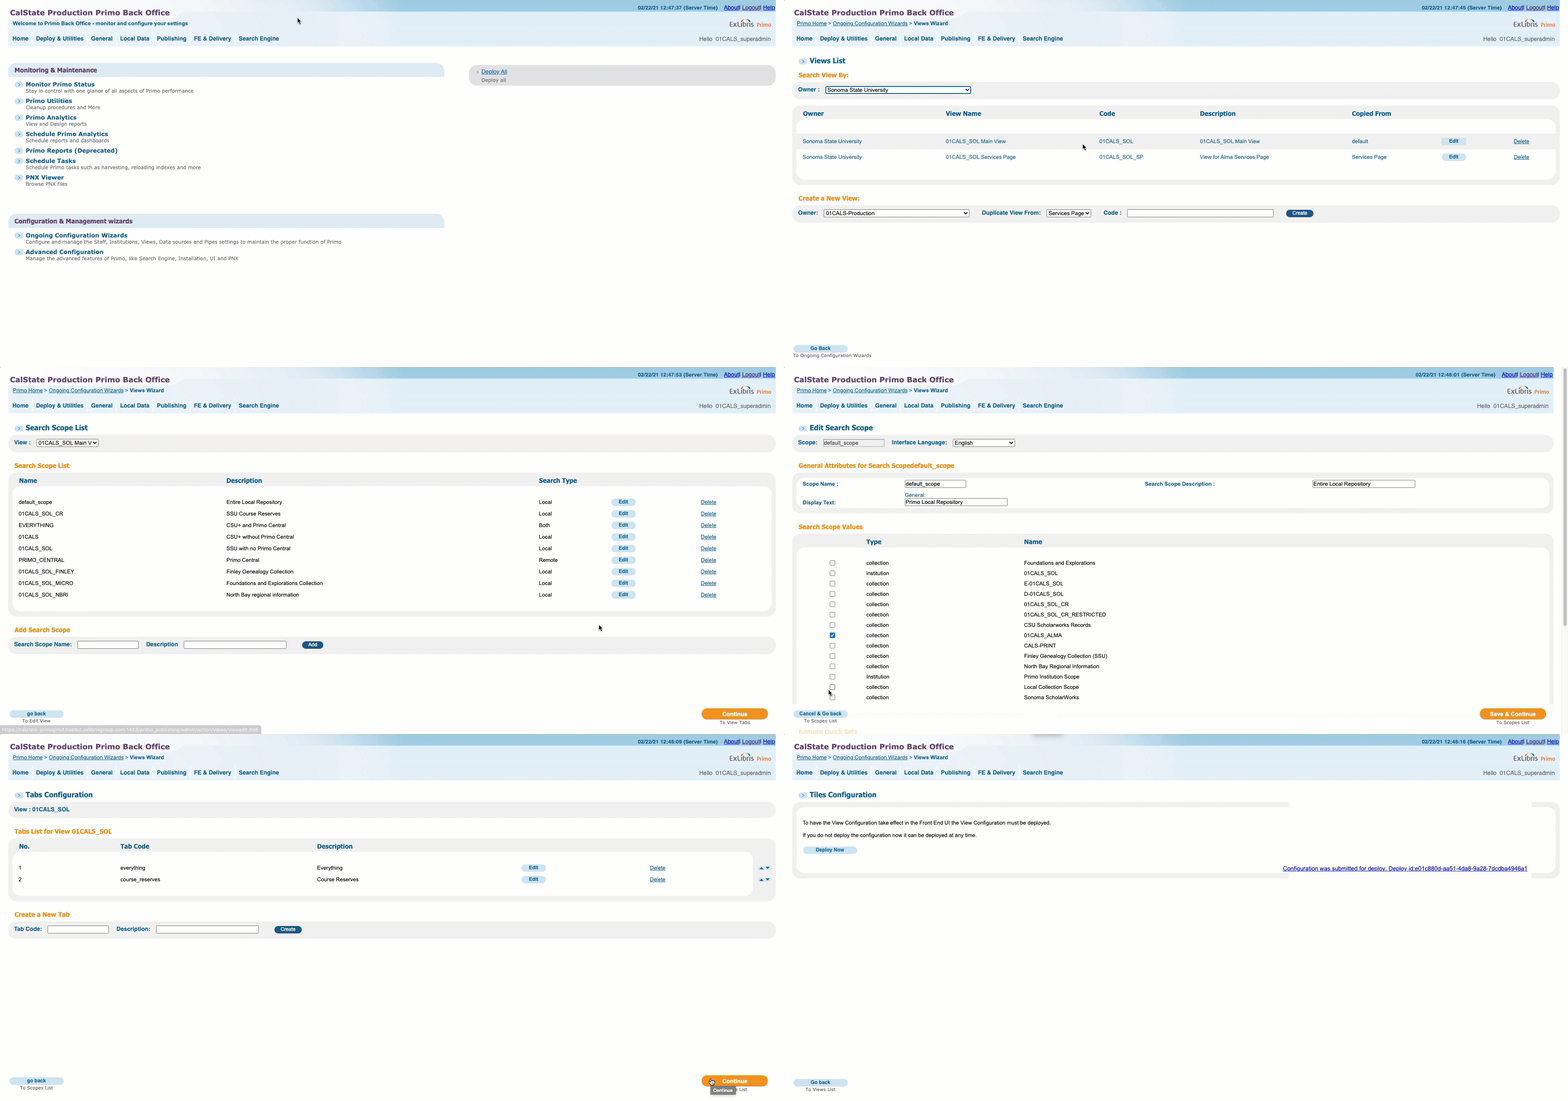
Step 2a: Add ScholarWorks Scope to library default scope
1) Go to PBO -> FE & Delivery -> Views List
2) Find Main View -> Edit
3) Save & Continue
4) Find your default (everything) Scope -> Edit
Check box next to the name of the scope you created
-> Save & Continue
5) Click Continue three more times
6) Deploy Now
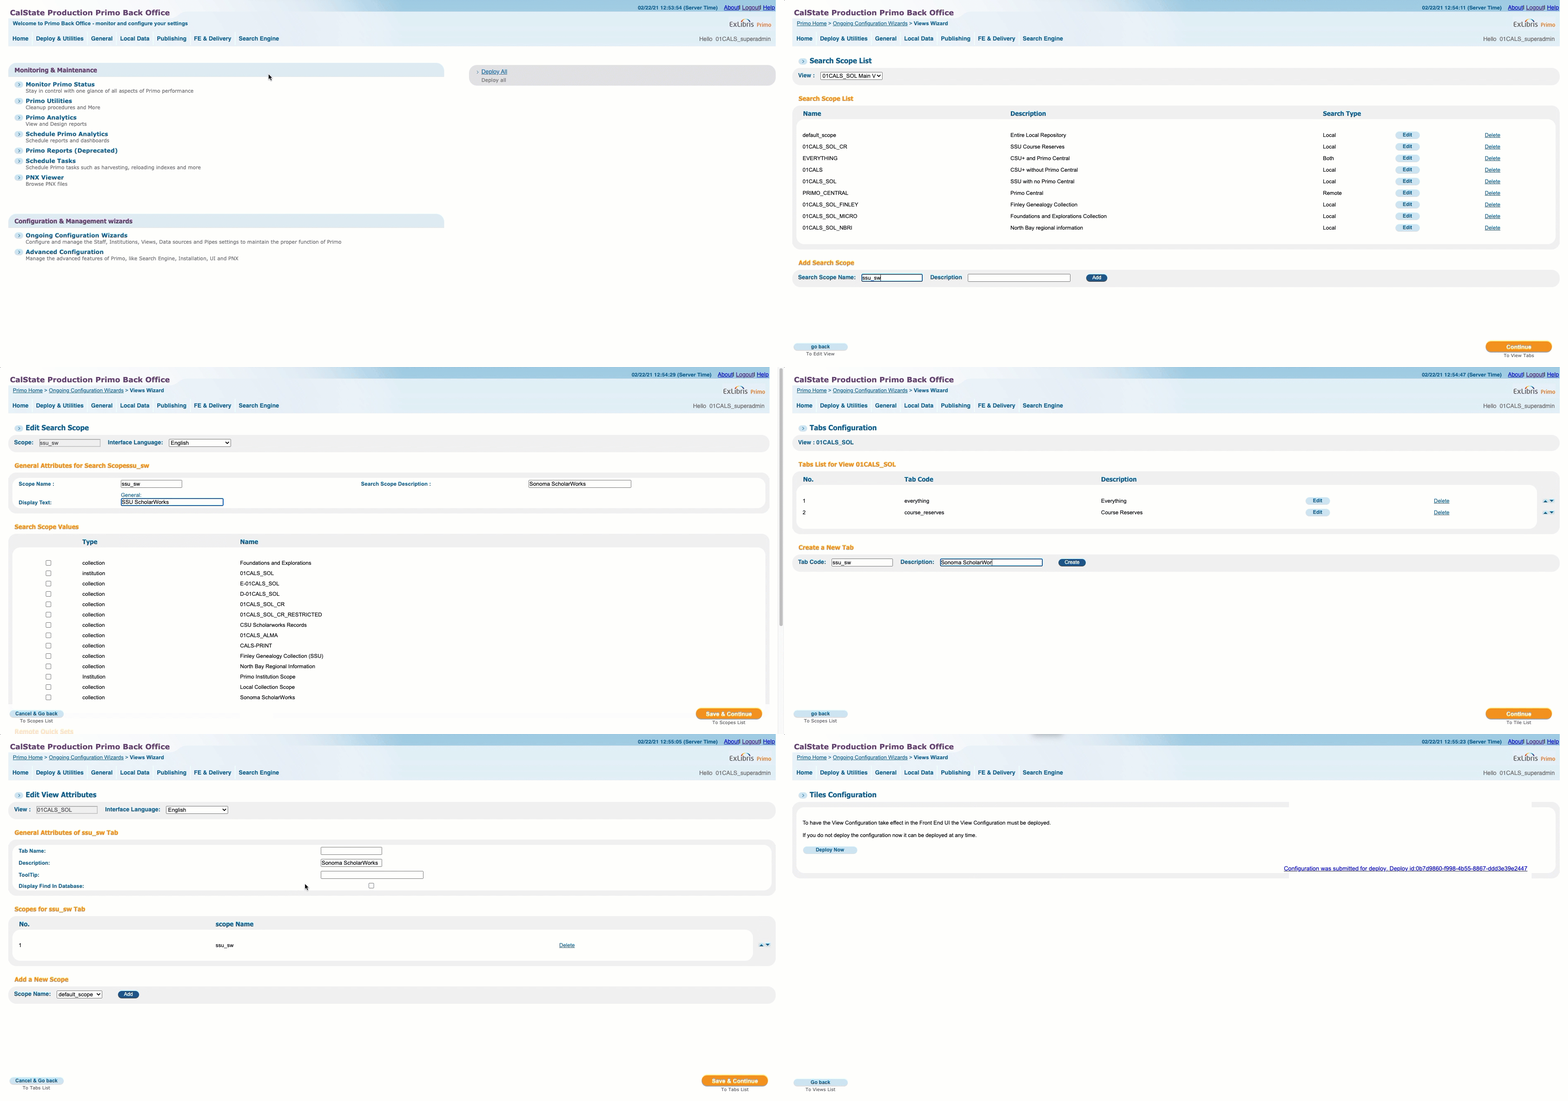
Step 2b: To create a separate search scope in dropdown list
1) Go to PBO -> FE & Delivery -> Views List
2) Find Main View -> Edit
3) Save & Continue
4) Add Search Scope
Give it an appropriate name (no spaces) & Description
Click Add
Add desired display text
Check box next to scope you created earlier
Save & Continue
5) Continue
6) Create A New Tab
Give it a name and description
Add a New Scope -> Select scope you created earlier -> Add
Save & Continue
7) Click Continue two more times
8) Deploy Now


